
Table of Contents
- Start With the Outside: How Water Gets In
- Signs of Poor Gutter Drainage You Shouldn’t Ignore
- How to Install Exterior Drain Tile Step by Step
- Preventing Ice Dams and Basement Leaks in Winter
- Interior Fixes: Sump Pumps, Sealants, and Backwater Valves
- DIY vs. Professional Intervention: When to Call a Pro
- What to Do Immediately After a Flood
- Long-Term Moisture Control and Insurance Documentation
- Frequently Asked Questions
Last Updated: September 21, 2026
Start With the Outside: How Water Gets In
If you want to know how to stop basement flooding, look up before you look down. Water almost always finds the basement through the soil around your house, not the floor itself. This guide from Metal Rivers Gutter Company starts with the outside fixes, because that’s where most flooding problems start.
Common Causes of Basement Flooding
Water gets in through more paths than most folks realize. The usual suspects:
- Clogged or undersized gutters that spill water right at the foundation
- Short downspouts that dump roof water within a few feet of the wall
- Poor grading that slopes soil back toward the house
- Foundation cracks in the wall or floor slab
- Hydrostatic pressure pushing groundwater up through the floor
- Failed or missing sump pumps during heavy rain
- A backed-up sewer line pushing water up through floor drains
- Ice dams in winter forcing meltwater under the shingles
Hydrostatic Pressure and the Water Table
Hydrostatic pressure is the force groundwater exerts against your foundation walls as the soil around them becomes saturated. When the water table rises after heavy rain or spring snowmelt, that pressure builds. Concrete is porous, so water pushes through.
Skipping the outside fixes and going straight to interior sealants is the most common mistake we see. Sealant slows water down. It doesn’t stop the source. If the soil around your foundation stays saturated, water will find a new crack within a season.
Signs of Poor Gutter Drainage You Shouldn’t Ignore
The clearest signs of poor gutter drainage are water pooling at the foundation, soil erosion under the downspouts, and staining or mildew on the siding. See any of these and your gutters aren’t doing their job.
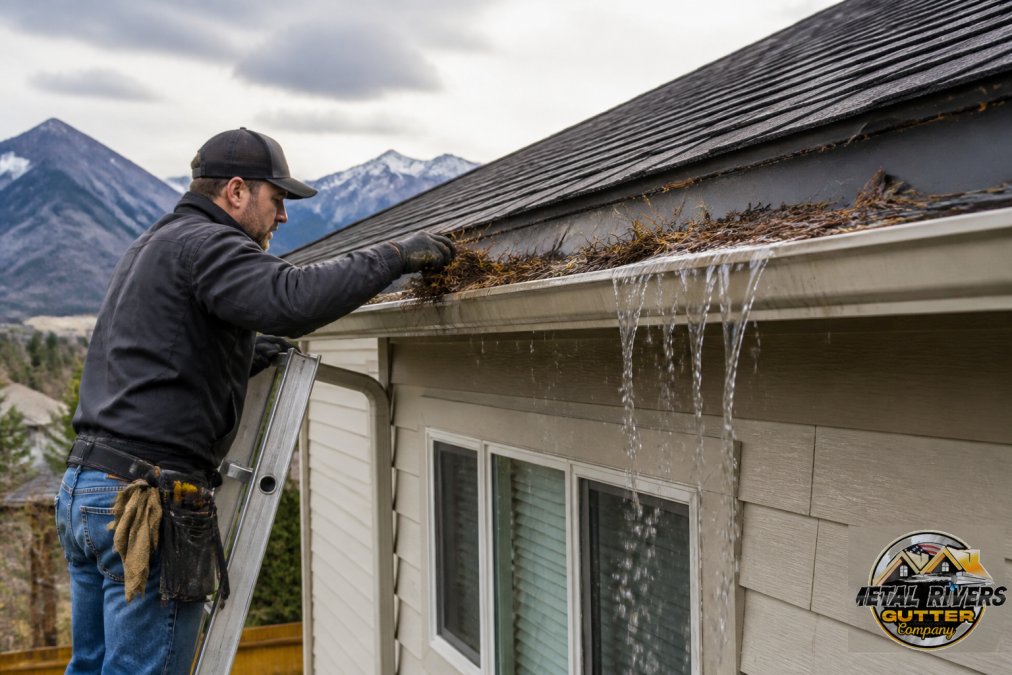
- Water sheeting over the gutter edge instead of running to the downspout
- Downspouts that trickle instead of gush
- Puddles sitting within a few feet of the foundation
- Streaks of dirt or mulch washed away near the wall
- Rust, peeling paint, or rot at the fascia board
- Gutters sagging or pulling away from the roofline
What Clogged Gutters Do to Your Foundation
A clogged gutter turns your roofline into a waterfall. Every gallon that should’ve run to the downspout pours straight down the wall instead.
How to Install Exterior Drain Tile Step by Step
Installing exterior drain tile means digging a trench along the footing, laying perforated pipe in gravel, and routing water to a discharge point away from the house. It’s the most reliable way to relieve hydrostatic pressure at the foundation.
Tools and Materials You’ll Need
Gather these before you break ground:
- Perforated drain pipe (4-inch rigid, or flexible corrugated)
- Washed gravel or crushed stone
- Filter fabric or a sock for the pipe
- A shovel, trenching spade, and a wheelbarrow
- A laser level or a long string line
- A backwater valve and check valve for the discharge line
- Landscape fabric and topsoil for backfill
Rent a trencher for long runs. Your back will thank you.
Step-by-Step Installation
- Call 811 before you dig. Every state runs a free utility locate service. Hitting a gas or power line is a life-safety issue, not a scheduling inconvenience.
- Mark the trench line. Run it along the outside of the footing, about a foot out from the wall.
- Dig the trench. Slope it about 1 inch per 8 feet toward the discharge point. Water has to flow, not sit.
- Line the trench with filter fabric. This keeps silt out of the pipe.
- Add a gravel bed. Two to three inches of washed stone first.
- Lay the perforated pipe. Holes facing down. Keep the slope steady the whole run.
- Cover with more gravel. Then wrap the filter fabric over the top.
- Backfill with soil. Compact it in lifts so it doesn’t settle into a trench.
- Route the discharge. Send it to a daylight outlet, a dry well, or a storm drain where local rules allow.
- Test it. Run a hose at the high end and watch where the water comes out.
Expected Result: Water that used to sit against your foundation now flows to a safe discharge point.
A common mistake is skipping the filter fabric to save a few dollars. Without it, silt clogs the pipe within a few years and you’re digging it up again. The fabric is the cheapest insurance in the whole project.
Preventing Ice Dams and Basement Leaks in Winter
Preventing ice dams and basement leaks starts with keeping your roof edge cold and your gutters clear. An ice dam is a ridge of ice at the roof edge that traps meltwater behind it. That water backs up under the shingles and works its way down.
Why Ice Dams Matter for Your Basement
Ice dams matter to your basement because the water they trap doesn’t just damage shingles. It travels. It soaks insulation, stains ceilings, and runs down inside wall cavities toward the foundation.
Winter ice hazards that gutters help prevent include:
- Ice dams at the roof edge that force meltwater under shingles
- Frozen downspouts that turn into solid ice columns and back up
- Icicles that pull gutters loose under their weight
- Ice buildup at the foundation from poor drainage
- Frozen ground that can’t absorb snowmelt, pushing it against the walls
Interior Fixes: Sump Pumps, Sealants, and Backwater Valves
Interior fixes handle water that gets past your outside defenses. A sump pump, foundation sealant, and a backwater valve form the last line of defense. None replaces good drainage, but together they catch what slips through.
Sump Pump Installation and Maintenance
A sump pump sits in a pit at the low point of your basement and pushes collected water outside. A submersible pump handles most homes. Add a battery backup so it still runs when the power goes out during a storm.
Maintenance is simple but easy to forget:
- Test it every few months by pouring water into the pit
- Clean the intake screen so debris doesn’t choke it
- Check the check valve so water doesn’t flow back in
- Replace the backup battery every few years
Sealing Foundation Cracks and Applying Concrete Sealant
Sealing foundation cracks stops minor seepage but won’t hold back real hydrostatic pressure. Use hydraulic cement or a polyurethane concrete sealant for hairline cracks and damp spots.
DIY vs. Professional Intervention: When to Call a Pro
Call a pro when the water source is underground, cracks keep returning, or the job involves digging near utilities. Handle the simple stuff yourself.
Here’s a quick way to decide:
| Problem | DIY or Pro | Why |
|---|---|---|
| Clogged gutters | DIY | Safe with a ladder and gloves |
| Loose or sagging gutters | Pro | Fall risk and proper pitch matter |
| Short downspouts | DIY | Add extensions, redirect flow |
| Regrading the yard | DIY (small) | Big jobs need equipment |
| Foundation cracks (hairline) | DIY | Sealant handles minor seepage |
| Foundation cracks (recurring) | Pro | Signals a drainage failure |
| Exterior drain tile | Pro | Deep digging near utilities |
| Sump pump install | Pro | Electrical and discharge routing |
What to Do Immediately After a Flood
After a flood, safety comes before cleanup. Water and electricity don’t mix, and standing water hides hazards.
Do these in order:
- Don’t wade in. If the power is on and water is near outlets or the panel, stay out and call an electrician.
- Shut off the power at the panel only if you can reach it while dry.
- Document everything. Photograph water lines on walls, damaged items, and any visible cracks.
- Remove standing water with a wet vac or pump once it’s safe.
- Dry it out fast. Fans and dehumidifiers within 24 to 48 hours to head off mold.
- Toss what can’t be saved. Wet drywall, insulation, and carpet are mold farms.
- Call your insurance company before you throw anything away.
The 24-to-48-hour window after a flood decides whether you’re dealing with wet carpet or a full mold remediation. Dry fast, document everything, and don’t wait on the insurance call.
Long-Term Moisture Control and Insurance Documentation
Long-term moisture control means keeping water away from the foundation year after year, not just after a storm. That’s a routine, not a one-time fix.
Build these into your calendar:
- Clean gutters in late fall and again after spring storms
- Check downspout extensions before the rainy season
- Test the sump pump before spring snowmelt
- Re-seal small cracks as you spot them
- Keep soil graded away from the foundation
Smart Home Flood Detection
Smart home flood detection uses small wireless sensors near the sump pit, water heater, and low corners of the basement. They ping your phone the moment they touch water.
Frequently Asked Questions
What soaks up water in a basement?
For minor seepage, materials like sandbags, water-absorbing socks, and wet/dry vacuums can help manage small amounts. However, these are temporary fixes. For a wet basement, the real solution is stopping water at the source with proper drainage, sealing cracks, and ensuring gutters and downspouts move water away from the foundation. If you have standing water, call a professional for water damage restoration.
Will insurance cover basement flooding?
It depends on the cause. Standard homeowners insurance often covers sudden, accidental water damage from burst pipes or appliance failures. However, flooding from surface water, groundwater, or poor drainage is typically excluded and requires a separate flood insurance policy. Document everything with photos and receipts, and contact your insurer immediately to understand your coverage.
How do gutter systems prevent basement flooding?
Gutters and downspouts collect roof runoff and direct it away from your foundation. Without them, water pours directly next to the foundation, saturating the soil and increasing hydrostatic pressure against basement walls. This pressure forces water through cracks and pores in concrete. Properly functioning gutters with extensions keep that water moving away, reducing the risk of seepage and flooding.
What should I do immediately if my basement floods?
First, ensure safety: turn off electricity to the basement at the breaker if it’s safe to do so. Avoid wading in standing water. Then, remove valuables and begin extracting water with a sump pump or wet/dry vacuum. Dry the space quickly with fans and dehumidifiers to prevent mold. Document all damage for insurance, and call a professional water damage restoration company if the flooding is significant.