

Last Updated: October 30, 2026
Quick Summary
To install downspout extensions, clean the downspout outlet, cut the extension to length, slide the sections together so water flows through the seam, and fasten it with rivets or screws every few inches. Check that it slopes away from the house, then run a bucket of water through to test for leaks. Extensions should carry runoff several feet from your foundation.
- Route water several feet from the foundation, always pointing downhill and away from the house.
- Choose heavy-gauge aluminum or steel in cold climates, since thin vinyl can crack in winter.
- Call 811 at least a few business days before digging a buried line.
- Slope a buried trench about 1 inch per 8 feet of run, with gravel below and around the pipe.
- Flush buried lines once a year so silt or roots don’t back water up toward the foundation.
Table of Contents
- Why Downspout Extensions Matter for Your Home
- How Far Should Downspouts Extend From the House?
- Choosing the Right Downspout Extension Type and Material
- Tools and Materials You Will Need
- How to Attach a Downspout Extension to Your Existing Downspout
- Burying a Downspout Extension Safely
- How to Keep a Downspout Extension in Place
- Schedule a Free Gutter Inspection With Metal Rivers
- Frequently Asked Questions
Why Downspout Extensions Matter for Your Home
Gutters only do half the job on their own.
Across the Midwest and the South, folks run into the same problems again and again.
Winter makes the case even stronger. Frozen downspouts can back up water onto the roof and into the gutters, which is how ice dams form.
Here’s what a properly placed extension helps prevent:
- Water seeping into basements and crawl spaces
- Ice forming on walkways and driveways after a thaw
- Soil erosion around the foundation
- Ice dams that form when runoff freezes at the eaves
Metal Rivers Gutter Company installs and repairs gutter systems across Northern Colorado.
How Far Should Downspouts Extend From the House?
Many installers recommend routing water several feet from the foundation. Properly managing this discharge is a critical component of a larger strategy that prevents foundation issues by ensuring the surrounding earth remains stable and dry.
Keep an eye on where the water goes after it leaves the extension.
Think about the path your walkways take, too. An extension that empties across a sidewalk gives you a sheet of ice on the first cold night.
Choosing the Right Downspout Extension Type and Material
Downspout extensions come in a few main styles, and the right pick depends on your yard, your winter weather, and how much work you want to put in.
| Type | Best for | Winter performance | Maintenance | Rough cost per section |
|---|---|---|---|---|
| Flexible / accordion | Quick fixes, tight corners, temporary routing | Can crack in extreme cold; folds trap debris that freezes | Flush and inspect each fall | $8-$20 |
| Rigid plastic or metal | Straight runs, high flow, long-term use | Holds shape; metal resists ice better than thin vinyl | Low; check joints yearly | $15-$40 |
| Telescoping / universal | Downspouts that don’t line up with standard lengths | Good if fastened well; seams can separate under ice load | Moderate; re-secure after freeze-thaw | $12-$30 |
| Buried drainage pipe | Discreet routing, mowing over the outlet, long distances | Best protection from surface ice; outlet must drain freely or it backs up | Annual flush with garden hose | $30-$80 for pipe and fittings |
How to decide in five minutes:
- If your downspout outlet is within 4 to 6 feet of where you want water to go and the ground slopes away from the house, a rigid or telescoping extension is usually the simplest fix.
- If you have to route water around a corner, past a walkway, or more than 8 feet, flexible accordion works for a quick fix but buried pipe is the better long-term answer.
- If you get hard freezes and ice dams every winter, skip the thinnest vinyl. Heavy-gauge aluminum, steel, or Schedule 40 PVC hold up better when meltwater refreezes at the outlet.
- If you mow over the discharge point or want a clean look, bury the line.
Material notes for cold climates: Aluminum and heavy-gauge steel hold up well in freezing weather. Vinyl and thin plastic can become brittle after years of sun and cold, and a brittle extension that cracks in January dumps water right back at your foundation.
A flexible extension that sags and holds water will freeze solid overnight. If you can see standing water in the folds after a rain, pitch it steeper or switch to rigid pipe.
Winter ice hazards this choice helps you avoid:
- A short or leaky extension lets meltwater refreeze on the sidewalk, turning your front walk into a skating rink.
- Water that pools at the downspout base builds a thick ice sheet that’s hard to chip and can crack the driveway.
- Backed-up water in a frozen downspout can push up under the roof edge and feed an ice dam at the eaves.
- Flexible extensions that collect debris freeze into solid lumps, blocking flow and sending water over the top.
Pick the sturdiest extension your budget allows, fasten it well, and aim the outlet where meltwater can spread out and soak in rather than refreeze in one spot. For more on protecting your foundation from runoff, see our step-by-step guide to preventing foundation erosion.
Tools and Materials You Will Need
Gather everything before you start. Most projects need only basic tools.
- Downspout extension kit or sections sized to your downspout
- Tin snips or a hacksaw for cutting metal sections
- Drill with a bit for pilot holes
- Pop rivets or sheet metal screws
- Measuring tape and a level
- Work gloves and safety glasses
- Exterior-grade sealant for joints
- For buried runs: a trenching shovel, gravel, and corrugated drainage pipe
Check the kit’s instructions for the right fasteners. Using the wrong screw is a common reason extensions work loose after the first storm.
How to Attach a Downspout Extension to Your Existing Downspout
Work through these steps in order to get a secure, leak-free connection.
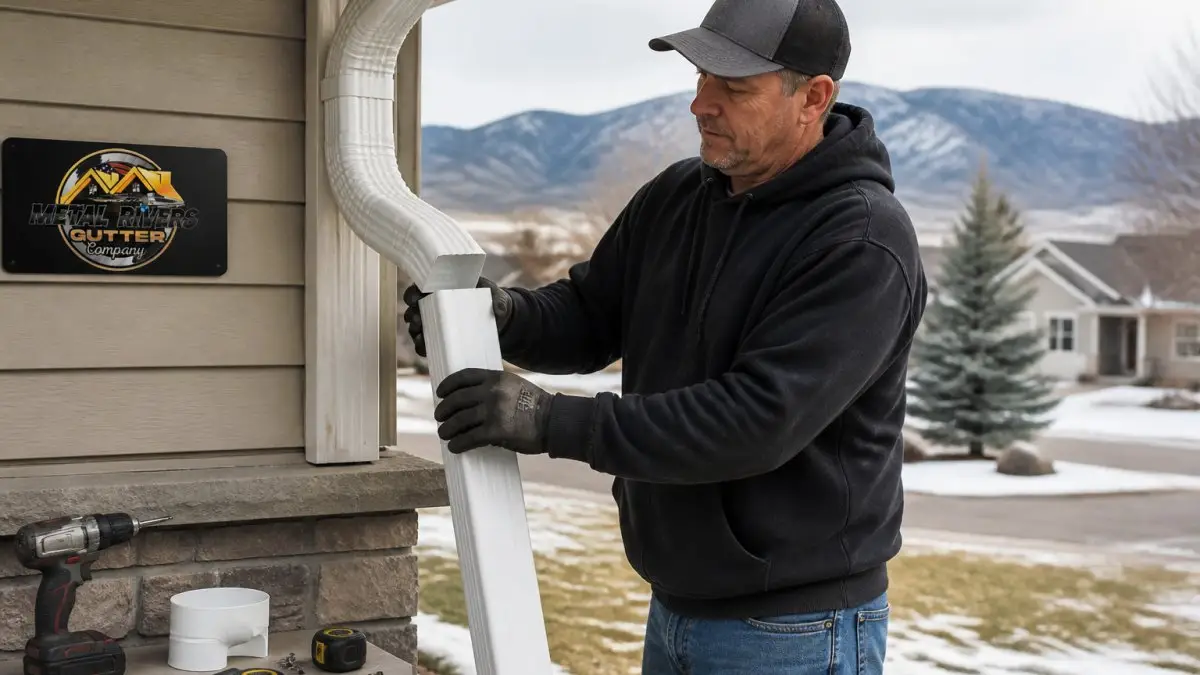
- Clean the downspout outlet. Remove leaves and grit so the connection seats properly.
- Measure and mark. Set the extension in place and mark where the joint lines up with the existing downspout.
- Cut to length. Use tin snips or a hacksaw, then smooth the cut edge.
- Slide the sections together. Overlap the joint so water flows downhill through the seam, not against it.
- Drill and fasten. Place pop rivets or screws every few inches through the overlapped section.
- Check the slope. Make sure the extension angles slightly away from the house so water runs out freely.
- Run a test. Pour a bucket of water through the downspout and watch for leaks at the joints.
Watch out: an extension that drops straight down with no slope can trap water inside and freeze solid in winter. Give the outlet a gentle downhill angle. If you’re wondering why water is dripping behind your fascia, our guide on gutter drip causes and fixes explains the common drainage problems.
Burying a Downspout Extension Safely
Burying a line keeps the yard clean and lets you mow over the discharge point. It takes more work, so plan the route before you dig. This is also the best defense against winter ice problems, a buried line carries meltwater away underground so it can’t refreeze across your walkway or driveway.
Before you dig:
- Call 811 at least a few business days before you plan to dig. This free service marks underground utilities, gas, electric, water, sewer, and communications, so you don’t hit a line.
- Check local rules on where you can discharge water. Some local governments restrict where runoff can be routed, so check with your city or county before you start.
- Walk the route and look for low spots, tree roots, and sprinkler lines.
Trench and pipe specs that work:
- Dig a trench about 10 to 12 inches deep and 6 to 8 inches wide. That’s deep enough to protect the pipe from mower blades and most frost heave.
- Slope the trench away from the house at about 1 inch of drop for every 8 feet of run. A 20-foot run should drop roughly 2.5 inches from start to finish.
- Use 3-inch or 4-inch corrugated drainage pipe (perforated only if you want water to seep into the soil along the way; solid pipe carries it to the outlet).
- Line the trench with a couple inches of gravel, lay the pipe, then cover with more gravel before backfilling with soil. Gravel helps water move and keeps soil from silting in the pipe.
- Put a catch basin at the downspout connection so leaves and grit settle out before they enter the pipe.
Outlet termination:
- End the line at a daylight outlet, a pop-up emitter, a grate, or an open pipe end, on a slope or in a drainage swale where water can spread out.
- Make sure the outlet sits well away from the foundation and points downhill.
- If the outlet is in a low spot, water will pool there and freeze in winter. Route to a higher spot or add a dry well.
- A pop-up emitter is a common choice because it stays closed when not in use and pops open under water pressure.
Winter-specific checks:
- Before the first freeze, flush the line with a garden hose and confirm water exits freely at the outlet.
- If the outlet is in a shaded area that stays frozen, consider routing to a sunnier spot or adding a gravel-filled dry well so water can drain underground.
- A buried line that clogs with silt or roots will back up and send water back toward the foundation, exactly the ice hazard you’re trying to prevent. Flush it once a year.
Take a photo of the trench and pipe route before you backfill. If you ever need to dig again for landscaping or repairs, you’ll know exactly where the line runs.
Common mistakes to avoid:
- Digging without calling 811 first.
- Running the pipe flat or uphill, which traps water that freezes and splits the pipe.
- Leaving the outlet buried in soil or mulch, which blocks flow and creates a soggy, icy patch.
- Skipping the gravel bed, which lets soil wash into the pipe and clog it within a season or two.
How to Keep a Downspout Extension in Place
An extension that wiggles loose will eventually separate from the downspout. A few simple habits keep it secure.
- Fasten brackets or stakes into the ground so the outlet can’t drift.
- Check the joints each spring and fall for loose fasteners or cracks.
- Clear leaves and debris from the outlet before the first freeze.
- Replace flexible sections that have split or cracked in cold weather.
Snow and ice can push on an extension during the winter, so a solid support makes a real difference.
Schedule a Free Gutter Inspection With Metal Rivers
If your downspouts are dumping water near the foundation, or you’re seeing ice buildup along the walkway, a professional inspection can show you the fastest fix. At Metal Rivers Gutter Company, our team installs custom seamless gutters cut on-site, and we offer free on-site inspections for homeowners across Fort Collins and Northern Colorado. Visit our contact page to get in touch and book a visit.
Frequently Asked Questions
How do you install a gutter downspout extension?
Start by measuring the downspout and choosing an extension that matches its size, usually a 2-by-3-inch or 3-by-4-inch profile for standard residential downspouts. Attach the elbow to the bottom of the downspout with sheet metal screws, then connect the extension sections and secure them with the same fasteners. Slope the final section slightly away from the foundation so water flows freely. Check the joints for gaps and make sure the outlet sits clear of landscaping and walkways before you finish.
How far should a downspout extension extend from the house?
A common guideline is to direct water at least 6 feet away from the foundation, though the right distance depends on your soil, grade and lot. Sites that slope toward the house or have clay soil often need the water carried farther. Make sure the outlet does not drain onto a neighbor’s property or a path where ice can form in winter. Standing water near the foundation is a sign the extension needs to go farther.
Can you bury a gutter downspout extension?
Yes, a buried extension can carry water underground to a lower outlet, which keeps the lawn clear and reduces trip hazards. Use solid or triple-wall drainage pipe with a sloped run, typically at least a quarter inch of fall per foot, and include a cleanout or a daylight outlet at the end. Keep the buried line clear of debris at the inlet, since a clog underground is harder to spot than one on the surface.
How do you keep a downspout extension from moving?
Secure each joint with at least two sheet metal screws and use a stake, bracket or concrete paver to hold the outlet section in place. Freeze and thaw cycles in Colorado winters can push loose extensions out of alignment, so check them each spring and after heavy storms. Adding a small support under the extension keeps it from sagging into the soil over time.
