

Last Updated: November 7, 2026
Quick Summary
To install gutters, first measure the roofline and sketch the layout, then mark a quarter inch of slope per 10 feet before cutting. Fasten fascia brackets every 24 inches, seal every seam, and aim downspouts away from the foundation so meltwater has somewhere to go.
- Measure each roof run and mark downspout locations before buying any materials.
- Aluminum cuts with aviation snips, but vinyl needs room to expand and vinyl-specific hangers.
- Snap a chalk line from high point to low point so water flows instead of pooling.
- Set a bracket every 24 inches plus one at each end and seam.
- Downspouts that dump water at the foundation feed ice sheets on the walk.
Table of Contents
- Step 1: Plan the Layout and Measure the Roofline
- Step 2: Gather Your Gutter Installation Tools and Materials
- Step 3: Mark the Slope and Pitch Before You Cut
- Step 4: Cut, Join, and Seal Gutter Sections
- Step 5: Learn How to Install Rain Gutters With Hangers
- Step 6: How to Install Gutters Downspouts for Proper Drainage
- Step 7: Avoid These Gutter Installation Mistakes
- Get a Free Inspection Before You Install
- Frequently Asked Questions
Step 1: Plan the Layout and Measure the Roofline
Learning how to install gutters starts with the roofline, not the ladder. A rain gutter system only works when every run slopes toward a downspout, so plan the whole layout before you buy a single hanger. A careful installer measures roof length and perimeter first, then marks where downspouts will land. That order saves homeowners a pile of rework. Water flow depends on it, and so does your home’s protection.
Grab a measuring tape and a notepad. Record the length of each roofline, the perimeter of the house, and the high point and low point of every run. Note where valleys dump heavy rainwater. Then sketch the layout.
- Measure each roof run end to end
- Mark downspout locations near grade drains
- Note the roof pitch and any valleys
- Map where water should exit the system
A common mistake is skipping the sketch. Folks buy materials, then find out mid-install that a run is too long for one downspout. Measure twice, cut once.
Step 2: Gather Your Gutter Installation Tools and Materials
Your gutter installation tools matter as much as the gutter itself, but the right kit depends on what the gutter is made of. A basic set covers most jobs, and gathering it all up front keeps you off the ladder twice. Here is the universal starter list:
- Measuring tape and chalk line
- Tin snips or metal shears
- Drill with a driver bit
- Level
- Sealant and caulk gun
- Hangers, brackets, and end caps
- Downspout, elbow, and outlet fittings
- Screws and fasteners
Now here is where material choice changes the job, and the tools you actually reach for.
Aluminum is light and easy to cut with aviation snips, but it dents if you lean on it. Use self-piercing screws or zip screws for hangers, and keep a rubber mallet handy to seat sections without deforming the channel. Hand snips work fine for small jobs.
Vinyl cuts fast with a fine-tooth saw blade or heavy-duty shears, but it expands and contracts with temperature swings. That means you need to leave a little room at seams and use vinyl-specific hangers that allow movement. Standard metal screws can crack vinyl if overdriven, so back off the torque on your drill.
Steel (precoated or galvanized) fights back with snips. You will want a heavier pair of offset snips or a nibbler, and you will go through more blades. Fasteners should be galvanized or stainless to avoid rust streaks.
Seamless systems are a different animal. They are cut on site with a roll-forming machine, so you do not buy sections at the store. For a DIYer, seamless usually means hiring a professional with truck-mounted equipment.
Watch out: using the wrong fastener for the material is a common mistake. Zinc-plated screws in treated lumber can corrode fast, and mismatched metals can cause galvanic corrosion where aluminum meets steel. Match your fasteners to your gutter and fascia material.
If you are weighing options, our guide on how to choose gutter materials breaks down the trade-offs for your climate and roof. Pick the material before you measure brackets, because the material affects the tools, fasteners, and hanger spacing you will need.
Step 3: Mark the Slope and Pitch Before You Cut
Gutters need a slope so water flows instead of pooling. A common guideline is a quarter inch of drop for every 10 feet of run. That is a small pitch, but it matters. Skip it and rainwater sits in the channel, then finds the seam.
Snap a chalk line from the high point to the low point of each run. Set the high point at the end farthest from the downspout. Then check the line with a level.
Here is how to mark it:
- Mark the high point on the fascia
- Measure the run length and calculate the drop
- Mark the low point at the downspout end
- Snap the chalk line between them
Watch out: a flat run or a backward slope causes standing water, and standing water is what splits seams and rusts steel. That is the mistake nobody wants to find after the first hard rain.
Step 4: Cut, Join, and Seal Gutter Sections
Cut each gutter section to length, then dry-fit it on the ground before it goes up. Dry-fitting shows you where seams land and where hangers will sit. It also catches bad cuts early.
For clean cuts, mark the line with a pencil and cut with snips. Cut slowly to keep the edge square. A ragged edge will not seal. Join sections with a seam connector, then run a bead of sealant along the joint. Press the pieces together and wipe the extra sealant.
Seams leak when they are rushed. Set the joint, seal it, and let it cure before you hang the run. For a deeper walkthrough on making precise on-site cuts, see our guide on cutting custom gutters on site.
Step 5: Learn How to Install Rain Gutters With Hangers
Here is the short answer on how to install rain gutters with hangers: fasten a fascia bracket every 24 inches, plus one at each end and each seam, then snap the gutter into the brackets. Hangers carry the weight of the gutter plus rainwater, so spacing matters more than people think.
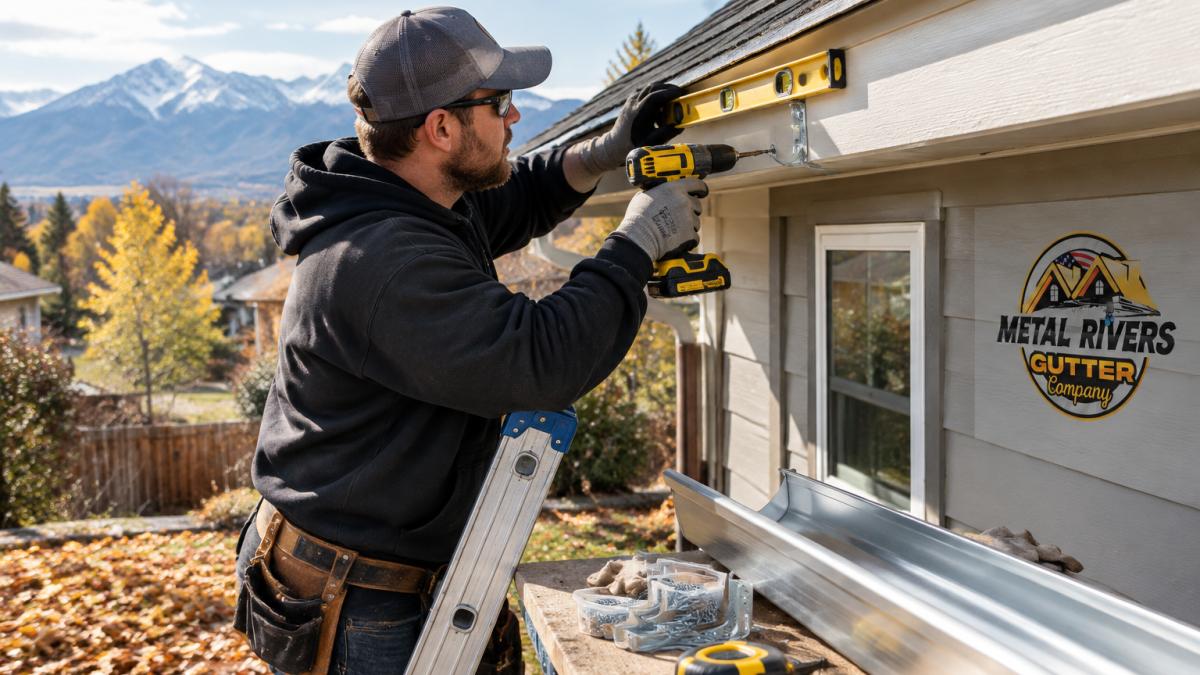
Work from one end to the other. Set the first bracket at the high point, then follow the chalk line. Screw each bracket into solid fascia, not into loose trim. A bracket that spins in soft wood will pull free under a load of water.
Watch out: hangers spaced too far apart let the gutter sag between them, and sagging gutters hold water and ice. Check the line with a level as you go. Snapping a long run into brackets takes two sets of hands.
Step 6: How to Install Gutters Downspouts for Proper Drainage
Downspouts move water from the gutter to the ground, and where that water lands decides whether your foundation stays dry. Attach the outlet at the low end of the run, then connect the downspout with an elbow at the top and another at the bottom. Fasten the downspout to the wall so it does not swing in the wind.
Keep the downspout clear of the grade. Water should exit away from the foundation, not against it. Corrugated downspout extensions carry it farther out. If you want to add extensions, our article on installing downspout extensions walks through the fittings.
In Northern Colorado winters, downspouts freeze. Water trapped in a downspout can split it when it freezes, so plan the drainage path before the first hard freeze.
Step 7: Avoid These Gutter Installation Mistakes
The most common gutter installation mistakes come from rushing the details. Each one shows up later as a leak, a sag, or a wet basement. Here is a quick-reference table of common errors.
| Mistake | Fix | Why It Matters |
|---|---|---|
| Flat or backward slope | Re-snap the chalk line at a quarter inch per 10 feet | Standing water rots seams |
| Hangers too far apart | Space brackets every 24 inches | Sagging gutters hold water and ice |
| Ragged cuts | Cut slowly with sharp snips | Rough edges will not seal |
| Downspout aimed at the house | Add an extension to move water away | Foundation damage |
| Skipping end caps | Seal both open ends | Water pours out the wrong spot |
One more mistake: hanging gutters before checking the fascia. Soft or rotted fascia will not hold brackets. Fix the wood first.
Now, what if you already installed the gutters and something is off? Here is how to troubleshoot the five most common post-installation problems.
Leaks at seams. Water dripping from a joint usually means the sealant failed or the seam was not clean. Scrape out the old sealant, dry the area completely, and reapply a high-quality gutter sealant.
Standing water. If water sits in the channel hours after rain, the slope is off. Check with a level.
Overflow during heavy rain. Water pouring over the front edge can mean the gutter is undersized for the roof area, the downspout is clogged, or the pitch is too flat. Check the downspout outlet first.
Sagging runs. Gutters that dip between hangers need more support. Add hangers midway between existing ones, or replace the hangers with a stronger style.
Downspout blockages. Water backing up at the top of a downspout means a clog. Remove the downspout and flush it with a hose.
Winter makes every one of these worse. Ice dams form when meltwater refreezes at the roof edge, and a gutter that cannot drain backs that water up under the shingles.
If a run starts pulling away from the house, our guide on fixing gutters that pull away covers the repair.
Get a Free Inspection Before You Install
DIY gutter work is honest work, but it is ladder work, and some jobs are better handed to a crew. Two-story rooflines, rotted fascia, and long seamless runs are often better handled by a professional crew. If you want to know what a professional install involves, gutter installation costs in Fort Collins explains the scope and what drives the numbers.
Metal Rivers Gutter Company cuts seamless aluminum, copper, and galvanized steel on site for a precise fit, and we also handle gutter and downspout repair when an existing system starts pulling loose or leaking at the seams. Every install is backed by a 5-year workmanship warranty, and paint warranties run from 20 years up to lifetime. We are locally owned, hold a BBB A+ rating, and have served more than 300 happy customers across Northern Colorado. Our free on-site inspections give you a clear picture before you spend a dime.
Ice and snow up here do not forgive a sloppy gutter job. If you want a system built to shed winter meltwater and keep it away from your foundation, get a quote from Metal Rivers Gutter Company. We cut seamless gutters on site for a leak-free fit, back the work with a 5-year workmanship warranty, and offer a free inspection to start. Get started with Metal Rivers Gutter Company and protect your home before the first freeze.
Frequently Asked Questions
How do you install gutters yourself?
Start by measuring the roofline and planning the layout, then gather tools like a tape measure, chalk line, snips, and sealant. Mark a slope of about a quarter inch per 10 feet toward the downspout, cut and dry-fit sections, and attach hangers every 24 to 36 inches. Seal joints, install downspouts, and test with water. If you are unsure about safety or local codes, hire a professional.
What tools do you need to install gutters?
You will need a measuring tape, chalk line, level, tin snips or cold-cutting tools, drill, screwdriver, sealant, and safety gear like gloves and glasses. For hangers and brackets, a nut driver helps. A ladder tall enough for your roofline is essential. Having a helper makes the job safer and faster, especially when handling long gutter sections.
What are common gutter installation mistakes?
Common mistakes include skipping the slope, which causes standing water, and spacing hangers too far apart, leading to sagging. Not sealing seams properly causes leaks, and poor downspout placement dumps water near the foundation. Forgetting to dry-fit sections can waste material. Also, ignoring winter ice hazards by not planning for proper drainage can lead to ice dams and damage.
How much slope should gutters have?
A common guideline is a quarter inch of slope for every 10 feet of gutter run toward the downspout. This helps water flow freely without pooling. Use a chalk line to mark the high and low points, and check with a level as you install. Too little slope causes standing water; too much looks odd and can strain hangers.
